| The radio design that I choose to build is an adaptation of Modern Radio Lab’s MRL#12 Improved Slider Crystal Set as found in DP 69. |
| I had originally made a Martian IV clone using the original 3-slider coil (HB17) as my guide, and I wanted to continue with horizontal coil configuration that incorporated a variable capacitor. |
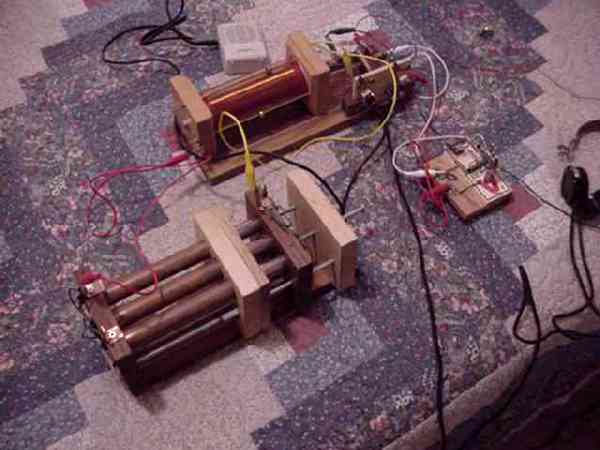
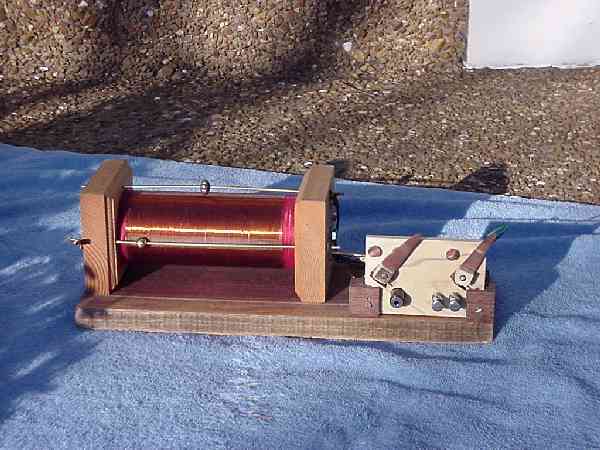
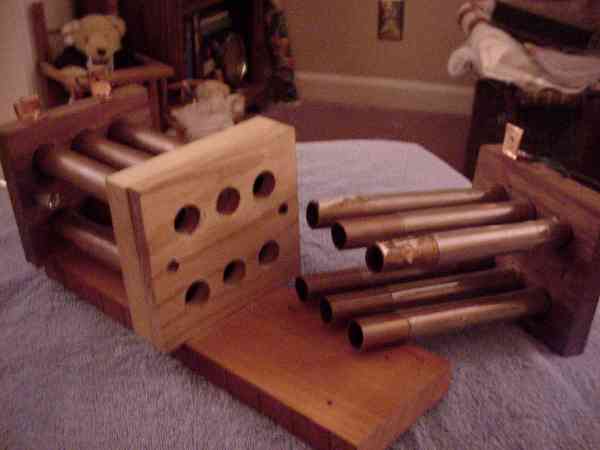
| Wood for the project included Black Cherry, Black Walnut, Splayed Maple and Red Oak. Coil sliders were made from brass lamp balls, or Indian silver beads. Brass rods were hand cut using a #4 40 hobbyist die. All copper clips were cut and formed from sheet copper. Wire used to connect components was #20 stranded wire. Except for screws and nuts, the only radio purchased items were the antique headphone posts, and the 1/8 female adapter used to permit an amplified Radio Shack speaker to be attached for group listening. Power tools were a drill press and a miter saw. |
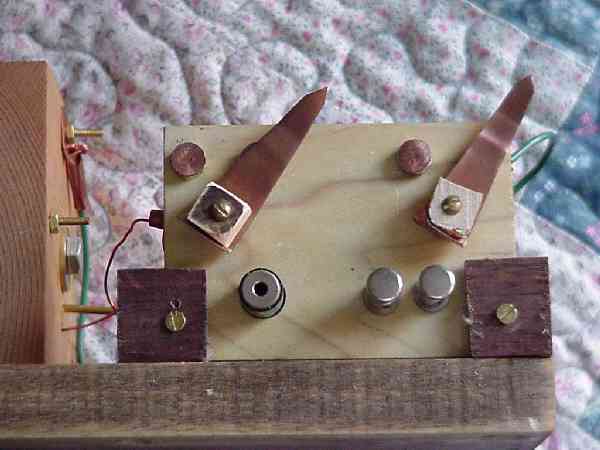
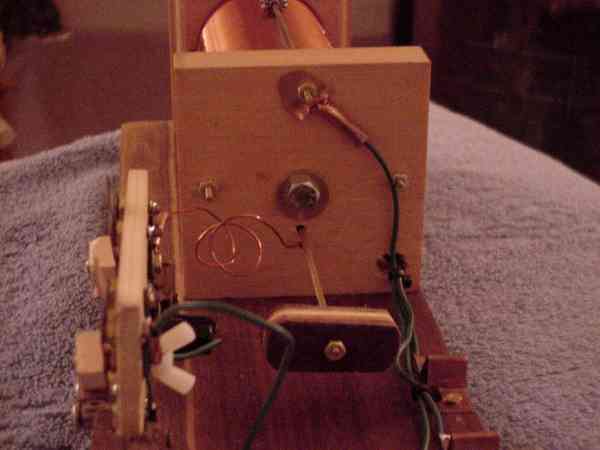
| Coil The coil itself used, #20 cooper magnetic wire, with 120 turns. This was chosen to avoid wire breakage due to the sliders friction. (First try with #24 snapped mid coil and would not solder smoothly.) The primary coil used an aspirin bottle so that I could have it slide on the carriage bolt that was used to hold the coil in place between the two pieces of maple door molding. (The carved concentric circles are perfect for a 2.5-inch PVC pipe.) The connecting clips for the attachment of the detector had a hole drilled in them to permit a diode or a transistor for testing. The headphone was set up with two switches to permit the output to be switched from headphone jacks to a mono jack for an amplified speaker. Thus I would not have to strap wiring behind the panel to hook up the speaker.
|
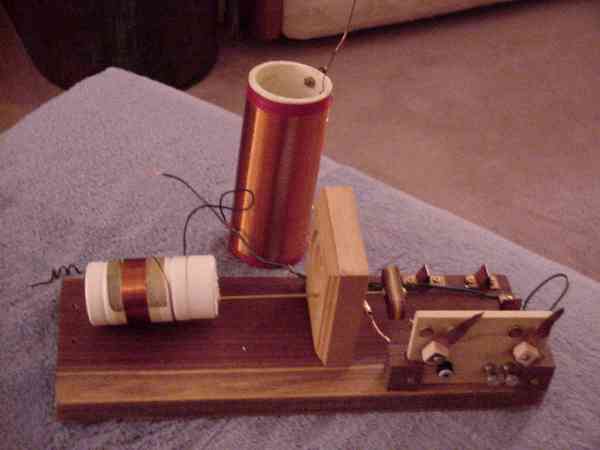
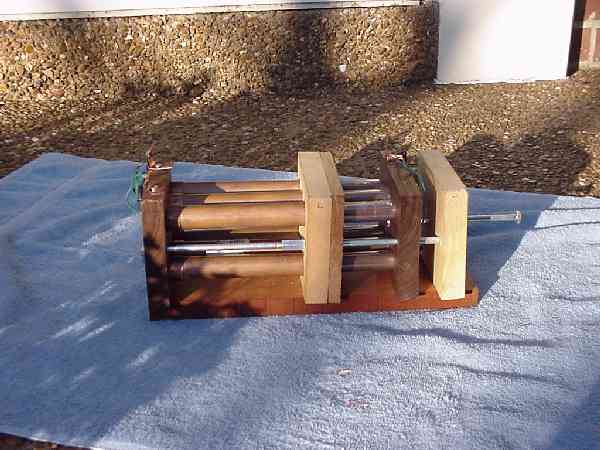
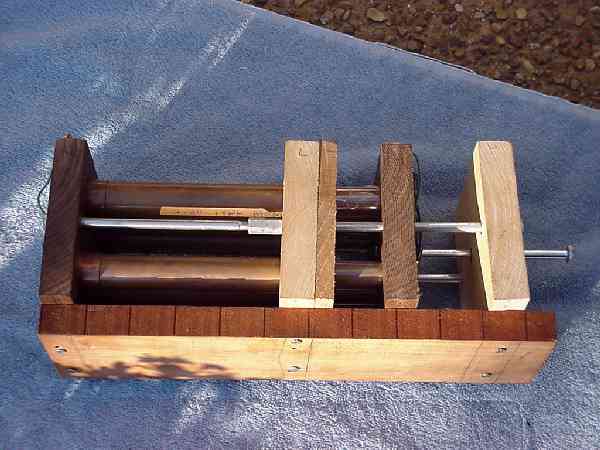
| Variable Capacitor This was a real treat to make. My first attempt was to build a sliding contraption that would have two sets of plastic combs covered in aluminum foil to supply the dielectric. With my skill (none) I could not get the drill press to cut the forms needed to have both structural soundness with the plastic teeth nor keep them in line for interaction without shorting out. Next I ruled out the coke can cap as too simple but liked the idea of sliding tubes. So I next tried cooper pipe and when a one-pipe gizmo worked I started to design a 6-pipe capacitor that would be built like a beehive. (Was not able to determine the capacitance of the single tube model, so 6 tubes had to better) Getting the angle right also proved my undoing and so the hex became square and the tube holes now remind you of a steam boiler. ľ pipes were used for the outside, connected to the back wood block with end caps screwed to the wood. Inner tubes were ˝ repair pipe with again caps attaching to the sliding block. Inner tubes were wrapped in slide show transparency film. The tubes were wired up 3 and 3 on the back end and all 6 on the front end to provide a 2x cap. My experiments are not conclusive if I achieved that. I did find again my drilling was off and the lower center pipes are touching and shorting out. Use of the cap means pushing down on the carriage bolt pull while moving the pipes in a horizontal manner. I estimated that for two polyfilm caps that would have cost $5.00, I invested over 30 dollars to buy the parts etc. for the cap.
|
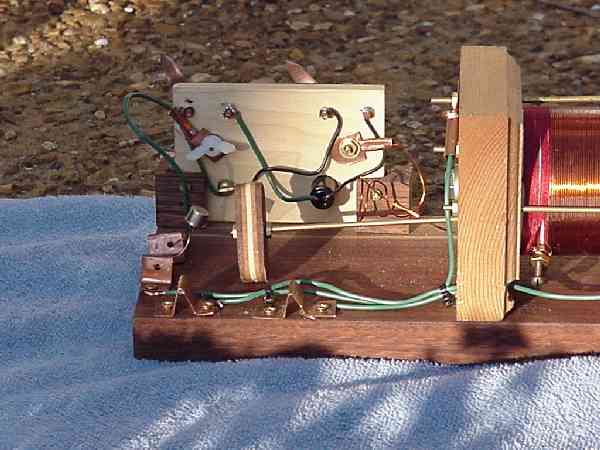
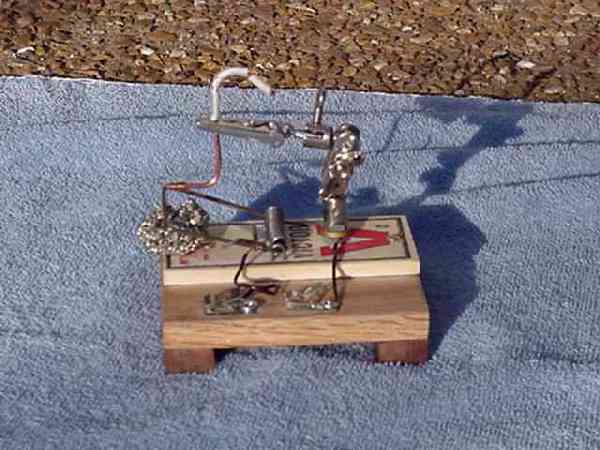
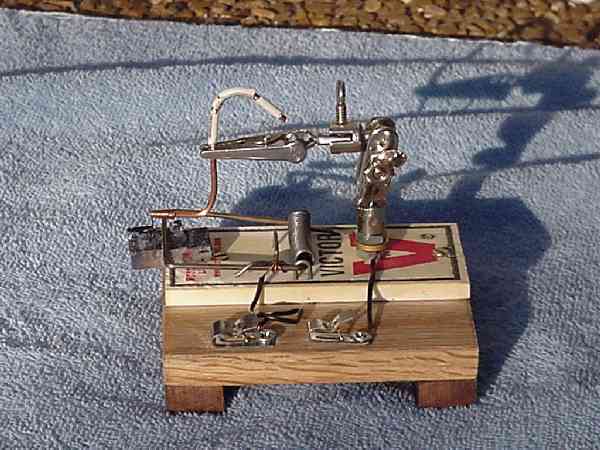
| Detector The detector was a prettied up version of my rattrap detector. Still feel this is a better design, than the traditional detector that uses crystal imbedded in metal. My detector can use any size crystal, razor blades etc, and can have the probe switched out for the needs of the various materials. Also with the gimbaled head, I can twist the probe to attack the crystal from multiple directions. It can also be locked down to keep the pressure on the hot spot without vibration causing the point to jump.
|
And for course the finished radio